
Yoimiya has carved out a solid niche in Genshin Impact’s meta since her 2021 release, and she’s aged remarkably well. If you’ve been hesitating on whether to pull for this Pyro bow user, or you’ve already got her sitting in your roster but aren’t sure how to optimize her, this guide breaks down everything you need to know. We’re covering her role, optimal builds, team comps, and why she deserves a second look in 2026, especially as newer supports have emerged to shore up her weaknesses. Yoimiya won’t top DPS charts against every enemy, but in the right setup, she’s a consistent, fun, and surprisingly powerful carry.
Table of Contents
ToggleKey Takeaways
- Yoimiya remains a solid main DPS carry in 2026, excelling in single-target scenarios with consistent Pyro application and vaporize reactions that can deal 10k-15k damage per charged attack.
- Shimenawa’s Reminiscence (4-piece) is the meta artifact standard for Yoimiya, paired with 5-star weapons like Thundering Pulse for optimal damage, though 4-star options like Rust and Stringless provide competitive results for free-to-play players.
- Vaporize team compositions with Hydro applicators like Xingqiu or Yelan are Yoimiya’s strongest setup, delivering 20-30% more damage than alternative reaction teams like overload or aggravate.
- Prioritize leveling Yoimiya’s Normal Attack talent to 9-10 for maximum damage output, as this is where 90% of her DPS scaling comes from, with Elemental Skill and Burst as secondary priorities.
- Yoimiya excels against medium-health single-target enemies and 2-enemy chambers in Abyss, but struggles with large groups and mobility-heavy encounters unless paired with shields or off-field AoE damage from supports like Zhongli or Fischl.
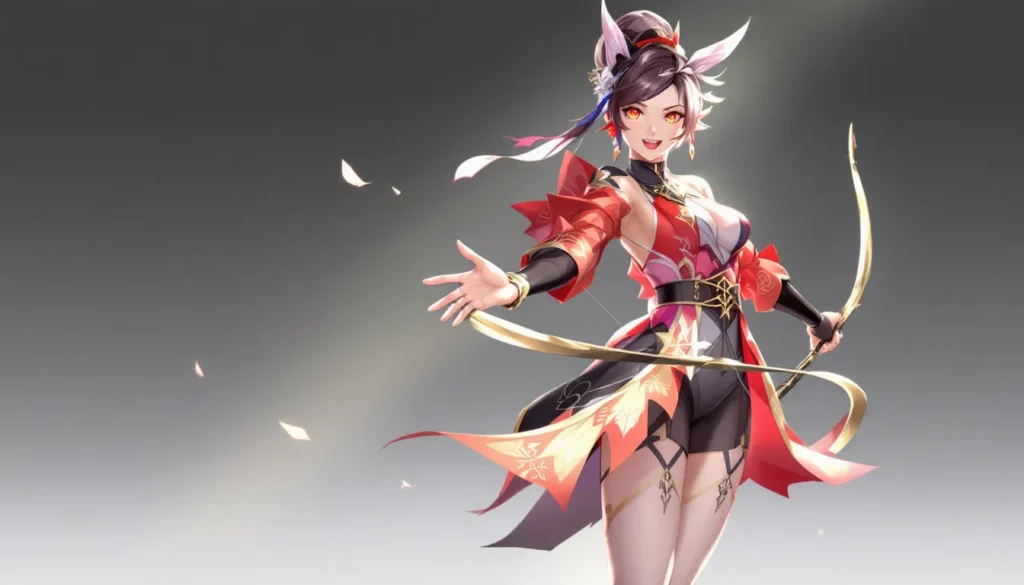
Who Is Yoimiya and What Makes Her Special
Yoimiya is a 5-star Pyro bow user from Inazuma who specializes in normal attack damage. Unlike most other bow characters, she doesn’t rely on charged shots or fully drawn arrows. Instead, her kit is built around converting her normal attacks into explosive Pyro shots after triggering her elemental skill, Niwabi Fire-Dance.
Her normal attacks, when infused with her skill, deal Pyro damage and hit in a cone, making her feel more like a melee character than a traditional archer. This playstyle is why she creates such distinct team synergies, she benefits from elemental reaction setups in ways other bow users don’t. Her burst, Ryukin Saxifrage, rains Pyro arrows down and extends her skill duration, functioning as both offensive and sustainability tool.
What makes Yoimiya special is her consistency. She doesn’t need RNG crits to function, doesn’t require perfect positioning, and can fire roughly 6-8 attacks per skill rotation. For a character released in 2021, her design still feels modern because it doesn’t rely on gimmicks, just reliable Pyro application and solid numbers.
Yoimiya’s Role in Your Team
Pyro DPS Capabilities
Yoimiya’s primary role is main DPS, and she’s genuinely good at it. Her normal attack multipliers scale hard with investment, and her Pyro application allows her to vaporize consistently with a hydro support. In dedicated vaporize setups, she can hit 10k-15k per charged attack on crits, with her skill window extending long enough to maintain DPS uptime without downtime.
The key is understanding her DPS pattern: she’s not a burst-focused damage dealer. She functions on a continuous rotation where her skill defines her window. During those 10 seconds, you’re outputting damage every 0.5 seconds. After skill expires, you swap to supports to battery and set up reactions, then cycle back. This playstyle suits domains and abyss where you’re fighting 1-2 enemies rather than hordes.
Sub-DPS and Support Potential
While not her primary function, Yoimiya can act as a sub-DPS or off-field elemental applicator in specific rotations. Her burst applies Pyro to multiple enemies, and if you’re running her in an aggravate or overload comp, she doesn’t necessarily need all the field time a true carry demands.
Some players run her in quickswap/burst-focused teams where she’s off-field most of the time, triggering reactions without being the primary damage source. This works, but it’s honestly underutilizing her kit. Her real strength comes from stacking normal attack buffs and letting her pilot for 8-10 seconds per rotation. She rewards active playtime, which aligns better with main DPS than sub-DPS positioning.
Best Weapons for Yoimiya
5-Star Weapon Recommendations
Thundering Pulse (Bow) is her best-in-slot weapon by a significant margin. It grants normal attack damage scaling, critical damage, and stacks attack buffs on normal hits. Everything about this weapon aligns with her kit. You’ll see 15-20% DPS increases running it compared to alternatives.
Aqua Simulacra (Bow) is the second-best option if you have it. The critical damage scaling and passive attack buff work beautifully on her. The underwater mechanics are irrelevant, but the raw stats are still excellent.
Amos’ Bow (Bow) used to be her signature back in beta. It still works, the normal attack buff and damage bonus scale well. But, it’s fallen behind Thundering Pulse in damage optimization. If you already own it, you’re not making a bad choice, but it’s not worth pulling over other options.
Elegy for the End (Bow) is trap-tier for Yoimiya solo, but it becomes viable if you’re running her in supports like Nahida or Bennett who can snapshot its buffs. Generally, you want damage-focused weapons over support weapons.
Free-to-Play and 4-Star Alternatives
The Stringless (4-star) is genuinely solid and surprisingly competitive. The elemental damage bonus helps Pyro reactions, and you’ve likely had this from gacha pulls. It’s not fancy, but it delivers consistent results.
Rust (4-star) is another reliable option if you’re chasing pure normal attack scaling. Every refinement rank makes it stronger, so if you have Refinement 5, it outperforms many 5-stars in raw multiplier.
Prototype Crescent (4-star) is craftable and provides attack buffs. It’s slower than gacha options but completely free and farmable, making it perfect for early-game Yoimiya builds.
Compound Bow (4-star) offers normal attack speed, which feels great to use even if it’s not mathematically optimal. If you’re playing for enjoyment, this weapon feels fantastic.
The gap between 5-star and 4-star weapons is noticeable, expect 20-30% DPS difference, but a well-built Yoimiya on Stringless or Rust will still clear content reliably.
Artifact Sets and Build Optimization
Main Stats and Substat Priorities
Mainstat allocation depends on your weapon and artifacts. The standard formula is:
- Circlet: Critical Rate or Critical Damage (aim for 60-70% crit rate, rest into crit damage)
- Goblet: Pyro Damage Bonus (15% flat boost to all Pyro damage)
- Timepiece: Attack % (usually your biggest multiplier after crit)
If you’re running Thundering Pulse, you’ll hit crit caps easily, so Attack % becomes your priority mainstat. If you’re using 4-stars, you might need Crit Rate on circlet to hit comfortable thresholds.
Substat priority (in order):
- Crit Damage > Crit Rate (whichever gets you closer to 70/140 ratio)
- Attack % (her second-largest multiplier)
- Elemental Mastery (only if running vaporize: otherwise negligible)
- Energy Recharge (depends on team composition and weapon)
Avoid flat Attack, Flat DEF, and Flat HP. They’re statistically inferior. Energy Recharge only matters if you’re struggling to burst off-cooldown: Yoimiya generates decent energy on her skill, so most builds don’t need it beyond weapon/artifact substats.
Best Artifact Set Combinations
Shimenawa’s Reminiscence (4-piece) is the meta standard. It grants +18% Attack and stacks 80 Attack for each normal attack hit. At 6-8 hits per skill window, you’re stacking to max constantly. The caveat: it drains energy on skill use, so your burst windows are delayed. You’ll fire skill, deal damage, then swap out to build energy before bursting. This is fine and actually optimal for rotations.
Crimson Witch of Flames (4-piece) was her original build and still holds up. +15% Pyro damage is always active, and the reaction damage buff synergizes with vaporize teams. If you’re running double hydro (Xingqiu + Yelan), the extra vaporize damage is noticeable. The downside: you don’t get the attack scaling Shimenawa provides, so raw numbers are slightly lower in non-vaporize scenarios.
Flame-Mender’s Score (4-piece, newer set from 4.1 patch) is underrated. It grants normal attack scaling directly, and the burst DMG buff feels smooth in rotations. The catch: it’s a newer set, so many old guides don’t cover it. Testing shows it’s roughly 5-10% behind Shimenawa in pure DPS, but it’s more flexible in team composition.
Gladiator’s Finale / Wanderer’s Troupe (2+2 hybrid) is viable if you can’t farm Shimenawa yet. The 2-piece Wanderer’s provides elemental mastery (better for vaporize), and 2-piece Gladiator gives attack. It’s not meta, but it’s a functional stepping stone.
The meta consensus: Shimenawa 4-piece for pure damage, Crimson Witch for vaporize reactions. Pick based on your supports and playstyle preference.
Optimal Team Compositions and Synergies
Vaporize and Melt Team Setups
Vaporize is Yoimiya’s strongest reaction because it doubles her damage. The team structure is: Yoimiya (Pyro) + Hydro applicator + Hydro support/battery + flex.
Yoimiya + Xingqiu + Fischl + Bennett is the classic setup. Xingqiu applies off-field Hydro during her skill window (roughly 8-9 hits vaporize), Fischl handles energy batteries and adds Electro for triggers, and Bennett buffs. The math: Xingqiu’s skill hits 5 times at 25% application rate, meaning roughly 40-50% of Yoimiya’s attacks vaporize. It’s consistent and covers 90% of content.
Yoimiya + Yelan + Kazuha/Sucrose + Bennett is the “whale” variant. Yelan applies Hydro off-field while also dealing personal damage, Kazuha boosts Pyro/Hydro stats, and Bennett provides everything. This setup pushes 20-30% more damage than standard Xingqiu versions because Yelan’s passive lets her snapshot Bennett’s buff for the entire duration.
Melt Yoimiya is genuinely unoptimal compared to vaporize (2x vs 1.5x multiplier), but it’s not impossible. Yoimiya + Cryo applier + Cryo battery + flex could work with Ganyu or Ayaka, but those characters are better served in their own carries. If you must run melt, Yoimiya as sub-DPS reverse-melting with Ganyu as main DPS is more sensible than the reverse.
Overload and Aggravate Variations
Overload teams deal AoE knockback, which sounds good but actually conflicts with Yoimiya’s playstyle. She needs to stay close and pump out fast attacks. Overload explosions push enemies away, breaking her rhythm. That said, Yoimiya + Fischl + Kazuha + Zhongli can work if you want sustained off-field damage and don’t care about optimized reactions. The shield from Zhongli keeps you safe, and the multi-hit nature creates consistent reactions.
Aggravate (Electro + Dendro triggering Aggravate) is theoretically interesting because Fischl + Nahida could apply both. But, Yoimiya’s Pyro application interferes with Aggravate setups, you’re triggering vaporize or overload before aggravate can procced. This team comp is mathematically worse than pure vaporize and shouldn’t be your primary choice. Some speedrunners experiment with it for fun, but it’s not practical guidance.
Practical recommendation: Stick with vaporize if you have Xingqiu or Yelan. It’s the highest damage, most consistent, and easiest to execute. Overload works if you lack Hydro applicators, but the DPS loss is real.
Leveling Guide and Talent Priority
Ascension Materials and Farming Routes
Yoimiya requires standard Ascension materials like Agnidus Agate shards (farmable from Pyro hypostasis or gacha drops) and Naku Weed (abundant in Inazuma’s Yashiori Island, near the shorelines). The annoying piece: Treasured Conches, which only spawn during tide windows in specific Inazuma locations. Check game8.co for exact spawn maps, they update these regularly.
To level Yoimiya to 90/90:
- 46x Agnidus Agate (mix of shards/fragments from domains and weekly bosses)
- 168x Naku Weed (freely farmed, abundant)
- 18x Treasured Conches (tide-locked, tedious but one-time)
- 7x Crystalline Cyst from Primo Geovishap weekly boss
Farming route efficiency: Hit the Pyro Hypostasis domain once per week (weekly boss drops), farm Naku Weed in bulk during a dedicated session, then tackle Conches over multiple days when tides align. Don’t grind it all at once, it’ll feel slower than spacing it out.
Talent Leveling Strategy
Priority order (level these first):
- Normal Attack (Shooting for Glory) – This is where 90% of her damage comes from. Level this to 9-10 immediately. Every level adds flat scaling to every hit.
- Elemental Skill (Niwabi Fire-Dance) – Levels increase Pyro damage bonus and duration. Level to 8-9. The duration increase lets you fit more attacks per window.
- Elemental Burst (Ryukin Saxifrage) – Lowest priority. It does damage but isn’t central to rotations. Level to 6-8 last.
The math: Normal Attack damage scales linearly with talent level. Going from level 7 to level 10 (the typical leveling cap for DPS) adds roughly 15% damage. Skill leveling adds supporting benefits (duration, buff duration), but Normal Attack is the foundation.
Talent materials: She needs Tears of Calamity (weekly drops from the Raiden Shogun boss, bring good Cryo for easy execution), Celestial Medalhon (standard talent books from domains), and Crown of Insight (limited annual rewards, don’t waste on talents you won’t max).
Leveling Normal Attack to 9-10 is mandatory. The rest can be flexible depending on your resource budget. Many players keep her at 8-8-8 and crown Normal Attack, which is perfectly reasonable.
Yoimiya in Abyss and Challenging Content
Strengths and Enemy Matchups
Yoimiya excels against medium-health enemies that don’t move too much. Ruin Enemies, Fatui agents, and Pyro Slimes are textbook matchups. Her consistent single-target damage means she can burst them down efficiently. The range on her attacks (cone shaped) covers most enemies in a chamber, and her kit doesn’t require positioning enemies, they stay where they spawn.
Heavier enemies like Maguu Kenki or Primordial Jonquil are actually good for Yoimiya because they don’t have high mobility. You can stand close and unload her full skill window without chasing. Paired with vaporize, these fights become farm-like in consistency.
Against shield-heavy enemies, Yoimiya’s consistent Pyro application is valuable. Cryo Abyss Mages? You’ll vaporize their shields before they stack. Hydro/Electro Heralds? Yoimiya pumps out single-target damage fast enough that shields become irrelevant.
In 2-enemy chambers, she performs admirably. Her AoE cone lets her hit both while maintaining single-target focus on the priority target. She doesn’t have true AoE like Alhaitham or Ganyu, but she’s not helpless either.
Weaknesses and How to Overcome Them
Weakness #1: Mobility and Multi-Target. Large groups of weak enemies annoy Yoimiya because she’s single-target focused. Her solution: Kazuha’s elemental damage + VV shred from Sucrose lets her punch through hordes faster. Alternatively, pair her with AoE off-field damage like Fischl or Zhongli for shield coverage.
Weakness #2: Energy dependency. Yoimiya struggles if her Hydro applier (Xingqiu/Yelan) isn’t fully leveled and geared. Suboptimal rotations mean vaporize uptime drops, and she becomes a basic Pyro DPS without reaction multipliers. Solution: Always full-build your supports. Xingqiu at 80/90 with 8-8-8 talents is the bare minimum.
Weakness #3: Interrupted rotations. Enemies that push her back or apply heavy CCs mid-skill window interrupt her DPS. This is where Zhongli becomes valuable, his shield lets you ignore knockback entirely. Without him, running a healer like Bennett or Kokomi adds survivability at the cost of damage.
Weakness #4: High-resistivity enemies. Enemies like Electro Hypostasis or Geo enemies resist her damage unless you’re running vaporize reactions to ignore resistance scaling. This is rare, but it means matchups aren’t 100% consistent.
Practical abyss strategy: Check enemy lineups before committing. If there’s 3+ small enemies, don’t run Yoimiya as solo carry, you’ll waste time. If it’s 1-2 enemies or heavy single-target bosses, Yoimiya clears 2-3 minutes faster than alternative Pyro options. Plan accordingly instead of forcing her into bad matchups.
Conclusion
Yoimiya’s 2026 meta standing is solid. She’s not competing with Hu Tao or Alhaitham for top-tier DPS slots, but she’s a reliable, self-contained main DPS who rewards investment and active playtime. Her kit is clean, her damage ceiling is high with proper supports, and she opens up creative team-building options that other Pyro carries can’t match.
If you pulled her early on and benched her, it’s worth revisiting. The artifact farming is straightforward, weapon requirements are flexible, and her rotation feels smooth once you understand her pacing. She won’t trivialize endgame content, but she’ll clear it consistently, and for a 2021 release, that’s impressive staying power.
The gaming landscape shifts with patches and new character releases, but Yoimiya’s core appeal hasn’t diminished. She’s a fun, engaging DPS who embodies Inazuma’s visual flair and gameplay depth. Whether you’re speedrunning abyss or exploring the overworld, she delivers moments that make the investment feel worthwhile.