
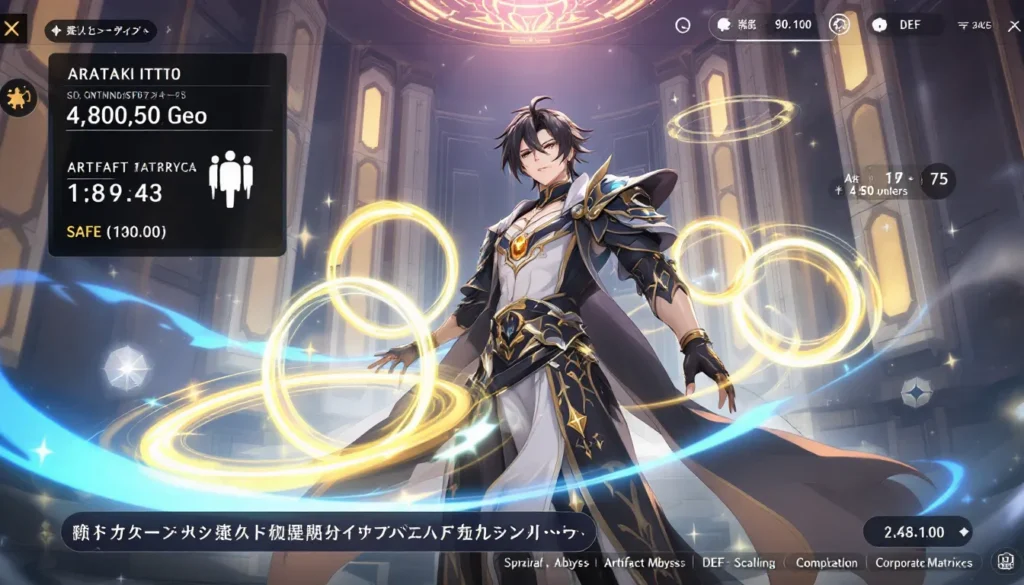

Arataki Itto has solidified himself as one of Genshin Impact’s most formidable Geo DPS characters since his debut. Whether you’re running him through Spiral Abyss or dominating world content, understanding his mechanics and optimal builds is essential to unlocking his full potential. This guide covers everything you need to know about building and mastering Arataki Itto in 2026, from artifact selections to team synergies and combat rotations that maximize damage output. If you’re considering adding this oni-inspired claymore wielder to your roster or want to refine an existing Itto setup, you’ll find the specifics you need here, no vague generalities, just actionable strategy backed by numbers and proven performance data.
Table of Contents
ToggleKey Takeaways
- Arataki Itto is a top-tier Geo DPS character whose damage revolves around managing Superlative Strength stacks and burst window timing for maximum output.
- Husk of Opulent Dreams (4-piece) is Itto’s best-in-slot artifact set, paired with DEF% sands, Geo damage goblet, and CRIT circlet to optimize his DEF-scaling kit.
- Geo Resonance (two+ Geo characters) is non-negotiable for Itto teams, providing a mandatory 15% damage bonus that should always be active.
- Gorou is a near-essential support character whose Elemental Skill grants Geo damage and DEF scaling directly benefiting Itto, making him a must-have for serious builds.
- Mastering Itto’s rotation—Elemental Skill, 5 Charged Attacks, Burst, 5 more Charged Attacks—requires precise timing to avoid stack waste and maximize burst phase damage.
- Itto performs exceptionally well in Spiral Abyss single-target chambers and domain challenges, with clear times of 30–45 seconds on bosses when properly built at 80/90 with 8+ talents.
Who Is Itto and Why Is He Worth Using
Character Overview and Playstyle
Arataki Itto is a 5-star Geo claymore user who functions as a primary DPS character with a unique stacking mechanic tied to his Charged Attacks and Elemental Skill. His kit revolves around building and maintaining Superlative Strength stacks, which buff his next Charged Attack’s damage considerably. Unlike other DPS characters who deal consistent damage frame-to-frame, Itto’s power scales directly with how well you manage his stack window and rotation timing.
His Elemental Skill (Masatsu Zetsugi: Akaushi Breach) summons a Geo construct and grants him Superlative Strength stacks on use. His Elemental Burst (Royal Descent: Behold, Itto the Unholy) elevates his playstyle by doubling his Superlative Strength stack generation for the duration, effectively turning his Charged Attacks into explosive finishers. This makes Itto’s burst window his highest DPS phase, positioning the burst correctly within a rotation is crucial for maximizing total damage output.
The character excels in extended fights where maintaining uptime on burst and skill cooldowns translates to sustained high damage. His playstyle rewards rhythm and precision: players who master the timing of stack consumption and burst windows will see dramatic damage spikes compared to those playing him casually.
Elemental Affiliation and Team Synergy
Geo is Itto’s element, which immediately limits and defines his team composition. Geo has no reaction-based amplification like Pyro (Vaporize, Melt) or Hydro (Bloom, Freeze), so Geo teams rely on Crystallize reactions for survivability and Geo resonance for raw damage buffs. Geo Resonance grants +15% damage bonus when you have two or more Geo characters in the team, this is non-negotiable for Itto builds and should always be active.
Itto’s best partners are other Geo sub-DPS or support units like Zhongli, Fischl off-element, Albedo, and Gorou. Gorou specifically is considered near-essential because his Elemental Skill provides Geo damage bonus and DEF scaling, both of which benefit Itto directly. The lack of reaction-based damage means Itto teams are more forgiving to build, you’re prioritizing personal damage and survivability rather than chasing elemental synergies.
Teams built around Arataki Itto in Genshin Impact tend to be more straightforward than reaction-focused teams. This simplicity makes him an excellent choice for newer players who understand basic mechanics but aren’t ready to juggle complex elemental chains. Also, players interested in other Genshin Impact Archives – Modernzombietaxi content will recognize this straightforward team structure across multiple Geo-focused guides.
Optimal Build Strategy for Maximum Damage
Artifact Selection and Main Stats
Itto’s best-in-slot artifact set is Husk of Opulent Dreams (the 4-piece version). This set grants DEF as a main stat bonus and stacks DEF whenever Itto gains Geo application, which happens frequently in his rotation. The stacking mechanic pairs perfectly with Itto’s kit, his Elemental Skill triggers stacks, and each stack on the artifact translates directly to increased ATK via his passive talent.
If you don’t have Husk or need an alternative, Retracing Bolide (4-piece) is a solid secondary option that grants a shield strength bonus and normal attack/charged attack damage increase. But, Husk is mathematically superior for Itto specifically because it synergizes with his DEF scaling and Geo affiliation.
For main stat priorities:
- Sand of Eon: DEF% (primary), ATK% or Energy Recharge (secondary)
- Goblet of Eonothem: Geo Damage Bonus (non-negotiable)
- Circlet of Logos: CRIT Rate or CRIT Damage (aim for 50:100 ratio minimum)
Substats should prioritize CRIT Rate, CRIT Damage, then DEF%. Energy Recharge is secondary unless you’re running him without an external battery, aim for 120-140 ER depending on team composition.
Weapon Recommendations and Alternatives
The Redhorn Stonethresher (5-star claymore) is Itto’s signature weapon and mathematically his best choice. It grants DEF scaling to normal and charged attacks, which directly multiplies his damage output since his entire kit revolves around DEF conversion.
If you don’t have Redhorn, viable alternatives include:
- Serpent Spine (4-star Battle Pass weapon): Consistent ATK boost with physical damage bonus. Requires active playstyle to maintain stacks but remains top-tier accessible.
- Whiteblind (4-star craftable): Grants DEF% bonus on hit, stacking up to 5 times. Slightly lower damage ceiling than Serpent Spine but more forgiving.
- Skyward Pride (5-star standard): Provides energy recharge and physical damage bonus. Better for energy-starved rotations but lower damage floor than Redhorn or Serpent Spine.
Weapon choice directly impacts your artifact and stat priorities. With Redhorn, prioritize CRIT Rate/Damage on circlets. With Serpent Spine, you can shift slightly toward DEF% if ATK is already sufficient.
Talent Priority and Leveling Path
Level your talents in this order of priority:
- Normal Attack (highest priority): This is Itto’s primary damage source and benefits directly from all his mechanics.
- Elemental Skill (secondary): Grants Superlative Strength stacks and cooldown management is critical.
- Elemental Burst (tertiary): Still important but not the primary damage contributor, it amplifies your Charged Attack phase.
For overall character leveling, getting Itto to 80/90 with all talents at 8+ is the standard for end-game content. The jump from level 1-8 on Normal Attack is massive: 8-10 requires significant resources. Most players settle at 9/9/9 talents and level to 80/90 as the breakpoint where diminishing returns kick in relative to artifact farming.
If you want to toggle off the HUD while fine-tuning your rotations in practice, the Genshin HUD Toggle: Unlock feature lets you focus entirely on visual feedback and timing without screen clutter.
Team Composition and Synergies
Optimal Team Configurations
The ideal Itto team is built around consistent Geo support and survivability. Here are the meta compositions:
Core Setup: Itto + Gorou + Albedo + Zhongli
- Gorou provides Geo damage bonus and DEF scaling via his Elemental Skill.
- Albedo acts as an off-field Geo sub-DPS, dealing consistent damage with his Elemental Skill.
- Zhongli provides the strongest shield in the game, allowing aggressive play.
- This is the highest damage ceiling team and requires significant investment in three 5-star characters.
Budget Alternative: Itto + Gorou + Fischl + Kokomi/Barbara
- Gorou remains essential for his damage buff.
- Fischl provides Electro application for Crystallize reactions (generates shields on hit).
- Kokomi or Barbara covers healing and off-field hydro application.
- Viable for players who don’t have Zhongli or Albedo. Crystallize shields are weaker but sufficient for most content.
Minimal Investment: Itto + Gorou + Ningguang + Bennett
- Ningguang provides Geo resonance and secondary damage.
- Bennett covers ATK buffing and healing.
- Missing dedicated Geo support reduces overall damage but remains functional.
Each configuration prioritizes two key elements: maintaining Geo resonance (two+ Geo characters) and ensuring Gorou is present whenever possible. Gorou’s Elemental Skill is so synergistic with Itto’s kit that he’s considered near-mandatory for serious builds.
Support Character Recommendations
Gorou (5-star/limited): Provides Geo damage bonus and DEF scaling on his Elemental Skill. His burst also grants additional Superlative Strength stacks. Run him with as much Energy Recharge as possible (140-160 ER) so his skill is always off cooldown. HP and DEF can be minimal since he’s purely a buffer.
Zhongli (5-star limited): The strongest universal shield provider. His shield applies Geo aura, triggering Husk stacks. Run him with maximum HP and Energy Recharge for near-permanent shield uptime. His Elemental Burst also reduces enemy resistance to Geo, amplifying team damage.
Albedo (5-star limited): Off-field Geo DPS who synergizes perfectly with shield-heavy Itto teams. His Elemental Skill deals damage on hits and his burst provides EM scaling. Pair with 4-piece Husk of Opulent Dreams and maximum DEF/CRIT stats.
Fischl (4-star permanent): Provides Electro application for Crystallize reactions without competing for field time. Her Elemental Skill summons Oz, who attacks off-field. Requires Constellation 6 (C6) for optimal performance but even lower constellations provide value.
Kokomi (5-star limited): Healer with Hydro application for Crystallize reactions. Her on-field presence isn’t ideal (takes field time), but her healing prevents deaths in harder content. Use her Elemental Skill and Burst, then swap to Itto immediately.
Remember that Itto teams function differently than reaction-focused teams. You’re building around personal damage and Geo resonance rather than chasing elemental multiplicities. This makes team flexibility higher, almost any off-field Geo or neutral support works.
Combat Mechanics and Rotation Guide
Understanding Itto’s Unique Stacking Mechanic
Itto’s damage revolves entirely around Superlative Strength stacks. His Elemental Skill grants 5 stacks, and his Elemental Burst grants 10 stacks. Each stack increases his next Charged Attack damage by a percentage, and consuming a Charged Attack removes one stack.
The critical detail: stacks last 60 seconds in total, and each stack is individual. This means if you gain 5 stacks at time 0:00, they disappear at 0:60, 0:61, 0:62, 0:63, and 0:64 respectively. In practice, you have a 60-second window to consume stacks before they start dropping off. Itto’s Elemental Skill cooldown is 10 seconds, and his Burst cooldown is 18 seconds, both with roughly 15-second downtime assuming proper timing.
During his Burst window, Itto gains doubled stack generation: his Charged Attacks consume 2 stacks instead of 1, and his Elemental Skill grants 10 stacks instead of 5. This makes his Burst phase his primary damage window. A well-timed Burst followed by 4-5 Charged Attacks back-to-back is the formula for peak DPS output.
Stack waste is one of the largest damage losses players encounter. If you cast your Elemental Skill at 55 seconds remaining on your current stacks, you’ll lose 5 stacks to expiration before consuming them. Similarly, casting your Burst when you already have high stacks may result in overflow (hitting the stack cap of 10, then gaining more that disappear immediately). Managing stack expiration timing is the skill expression in Itto play.
Efficient Rotation Sequences for DPS Optimization
The standard optimal rotation is:
- Elemental Skill (gain 5 stacks, -10s cooldown)
- Charged Attack x5 (consume all 5 stacks, massive damage spikes)
- Elemental Burst (gain 10 stacks, -18s cooldown)
- Charged Attack x5 (consume all 10 stacks, doubled damage multiplier)
- Normal Attack spam (filler while waiting for cooldowns)
- Repeat when Skill comes off cooldown
The exact timing depends on your Energy Recharge. If you have 120 ER, your Burst is ready roughly 15 seconds after casting it (accounting for particle generation). If you have 160 ER, it’s ready faster. Adjust your Normal Attack filler accordingly.
In practice during actual combat:
- Cast your Elemental Skill, immediately Charged Attack 5 times in rapid succession (hold direction + Charged Attack button).
- After consuming those stacks, wait 3-5 seconds for particle generation and Burst readiness.
- Cast your Burst and immediately enter the Charged Attack phase again.
- During the Burst window, input Charged Attacks as fast as your ping allows. Each one hits harder due to the doubled multiplier.
- Once stacks are gone or your Burst duration ends, resume Normal Attacks and wait for Elemental Skill cooldown.
Variations exist for different team compositions. If you have an off-field Geo applicator like Albedo, you can reposition and maintain Husk stacks during downtime. If you have a shield like Zhongli, you can play more aggressively and maintain more Charged Attack uptime.
The key principle: Burst window damage is 2x multiplied, so maximize Charged Attacks during Burst. Every Normal Attack during Burst duration is a DPS loss compared to spending that time generating burst energy for the next rotation.
Common Mistakes to Avoid
Not prioritizing Geo Resonance: Running Itto with only one other Geo character (or none) immediately loses 15% damage bonus. This is the single largest mistake. Always aim for 2+ Geo characters.
Casting Elemental Burst at the wrong time: Bursting when you already have high stacks or when your Charged Attack window is about to expire results in massive stack waste. Ideally, cast your Burst when you have 1-2 stacks remaining and immediately transition into your Charged Attack phase. Timing is everything.
Over-investing in Energy Recharge: Itto’s Energy needs are modest (120-140 ER is comfortable). Beyond 160 ER, additional points are wasted stats that could go toward CRIT or DEF. Use an ER sands only if your substats are particularly bad: DEF sands is almost always superior.
Ignoring Gorou if accessible: If you have Gorou and aren’t running him with Itto, you’re leaving 20%+ damage on the table. His Elemental Skill is that impactful. Even at low investment (level 50, basic artifacts), he provides immense value.
Running incorrect artifact mainstats: Geo damage on goblet is mandatory. If you’re using ATK or Physical Damage on your goblet, you’re severely limiting your damage ceiling. Similarly, DEF on your sand is nearly always correct, ATK sand only works if you’re using a DEF weapon like Whiteblind and even then it’s marginal.
Not maintaining shield uptime: If you have Zhongli, the shield should be permanent or near-permanent. A lapsed shield means you’re playing defensively and losing Charged Attack uptime. Invest enough ER to keep his shield active.
Consuming stacks inefficiently during Burst: During your Burst window, your Charged Attacks consume 2 stacks instead of 1. This means you have fewer total attacks to execute with doubled damage. Prioritize Charged Attacks over Normal Attacks during Burst, every Normal Attack is a wasted window.
Placing Geo constructs in bad positions: If you’re using Albedo or relying on Gorou’s construct, positioning matters. Placed too far from the enemy, they won’t proc effects or generate shields. Place them where you’ll be spending most of your time (where the enemy is) to maximize uptime.
Itto in Different Game Content
Spiral Abyss Performance and Recommendations
Spiral Abyss is Genshin Impact’s primary end-game content and where Itto shines most. As a dedicated DPS character with defined rotations and high personal damage, he performs consistently across most floor lineups.
In recent Abyss cycles (2024-2026), Itto has been viable for:
- Single-target chambers (bosses, rare enemies): His high Charged Attack damage and consistent crits make him excellent for focused burst windows.
- Multi-target chambers with spaced enemies: His Charged Attack AOE isn’t massive, but he can position to hit multiple enemies with proper angles.
- Geo-heavy floor buffs: When Abyss provides Geo damage bonuses or DEF scaling buffs, Itto’s teams scale harder than other DPS options.
Where Itto struggles:
- Heavy interruption/knockback scenarios: If enemies push him around constantly, maintaining rotation and Charged Attack timing becomes difficult. Shields mitigate this significantly.
- Pure AOE-focused chambers: Characters like Hu Tao or Kazuha-buffed teams have better multi-target coverage. Itto excels in focused damage, not spread damage.
For Abyss lineups specifically:
- First half of the cycle: If buffs favor Geo or DEF, Itto is a top-tier choice. Otherwise, he remains solid but potentially not the meta pick.
- Second half: Similarly dependent on elemental buffs and enemy positioning. Always check the Abyss preview and weigh your options.
Typical Abyss Itto team: Itto, Gorou, Albedo/sub-DPS, Zhongli. This is the most consistent arrangement for maintaining high uptime and burst windows.
Expect 30-45 second clear times on single-target bosses with proper builds (80/90 character, 8+ talents, good artifacts). Multi-target chambers may extend 10-20 seconds depending on enemy spacing.
World Exploration and Domain Challenges
Outside of Spiral Abyss, Itto performs exceptionally well. World exploration rarely requires optimized rotations, enemies die quickly enough that casual Charged Attack spam works fine. His high personal damage means you can face-roll through most overworld content.
Domain challenges (artifact farming, talent materials, weapon materials) are where Itto excels because domains are essentially controlled environments with known enemy patterns. You can practice rotations consistently and face-tank damage with shields. Domains have no stat check that other DPS characters pass better, Itto’s raw damage is sufficient.
Tips for domain farming with Itto:
- Use domains to practice rotation timing. Domains repeat, so you’ll run them 15+ times per farming session.
- Bring a healer or shield for safety, but Itto’s personal survival is solid. Geo constructs provide Crystallize shields passively.
- If you’re farming for artifacts to improve Itto himself, expect diminishing returns on upgrade quality. Getting from good artifacts to perfect artifacts takes dozens of sessions.
World bosses (Azhdaha, Thunder Manifestation, etc.) are trivial for Itto with a proper team. His consistent damage and burst windows let you burst down health pools quickly. The main challenge is positioning around AOE patterns, not DPS checks.
Compared to guides on sites like Rock Paper Shotgun, which often focus on broader gaming strategies, Genshin Impact content requires specific character-level optimization. Itto’s straightforward playstyle makes him beginner-friendly compared to reaction-dependent characters, yet his stack mechanics reward mastery.
Conclusion
Arataki Itto represents one of Genshin Impact’s most satisfying DPS designs, his mechanics reward rhythm, positioning, and burst window management. Mastering Itto isn’t about chasing impossibly high stats: it’s about understanding his stack system, timing your Bursts correctly, and building teams that complement his straightforward Geo playstyle.
The core takeaways: prioritize Geo Resonance, always run Gorou if accessible, focus artifacts on Husk of Opulent Dreams with proper mainstats, and practice Charged Attack timing to maximize your burst window damage. Your personal skill matters more than gear past a certain threshold, a player who executes rotations flawlessly on moderate artifacts will outdamage a player with perfect artifacts playing carelessly.
Whether you’re climbing Spiral Abyss or dominating exploration, Itto remains a top-tier Geo DPS choice in 2026. His kit ages well because DEF scaling and raw damage numbers are timeless. Invest in him confidently, and you’ll have a reliable primary DPS for years of Genshin Impact content.